Seven Segment LED Arduino Clock
As an early Christmas present this weekend, my dad let me go through his old electronics parts boxes to pick out anything I might find useful. One of the first things to really catch my eye was a seven segment LED display.
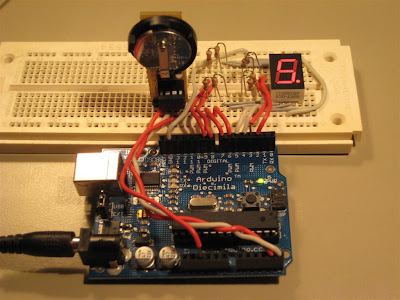
These are the type displays you see in most digital clocks, so making a clock out of them isn't particularly ground-breaking. Unfortunately, I only have one digit, so just displaying the full time was out of the option. I've seen videos of single tube nixie clocks online, and appreciate the style of flashing each digit individually (Granted, they're doing it because nixie tubes are #%$! expensive, and not because they just don't feel like spending the $3 for a 4 digit display).
The thing on the left is the module I built for my DS1307 so that it'll always be backed by a battery and never lose the time. Super nice when you're moving it between projects.
I pretty much explain everything in the video, but as anyone who has recorded themselves know, you get 50% less articulate once you press record. I point out that AM/PM is easy, since you only need to divide by 12. This is correct, since I'm running the DS1307 in 24 hour mode, but kind of silly, since the DS1307 has a 12 hour mode. I simply run it in 24 hour as a matter of personal preference, since I'm using the same clock chip over and over in all my projects, some of which really lend themselves to 24 hour mode, and don't find converting between 24 and 12 hour mode that difficult when needed.
I also mention using a shift register LED driver. I haven't mentioned these yet, but I bought a couple LED drivers, which are nice because they let you drive 8 or 16 LEDs, using only one resistor to limit current, and only 2-4 pins on the controller. This means it's trivial to change resistor values to adjust brightness, and that I don't have to worry about my power budget on the controller. (Link to the 8 bit LED driver I bought)
Source code.
Note that I got lazy, and used
delay()s everywhere in the display system, so there really isn't any way to set the time on the clock as is, other than plugging it into a computer and using the serial port. Feel free to convert it to being non-blocking, but I didn't feel like putting that much effort into a quickie weekend project like this.